Sunday 20 August 2017

Adding images to appear on POS screens for Dynamics 365 for operations-2

....contnd

you must have already gone through part 1 of the blog. if not, please go through that first before proceeding ahead.

3. Product images:
To make any changes to a image format, we will be using the attribute group "Default product attribute group". if you see the XML for Image, there are 5 different URL tags that are mapped. It simply means that we can have maximum of 5 images stored per product with the suffix of

/Products/ <ProductNumber>_000_001.jpg
/Products/ <ProductNumber>_000_002.jpg
/Products/ <ProductNumber>_000_003.jpg
/Products/ <ProductNumber>_000_004.jpg
/Products/ <ProductNumber>_000_005.jpg

"ProductNumber" here simply means the ItemId we have.

CPOS/MPOS will display same number of images as stored at Product folder

Service Volume(drive)>>Retail Server >>Webroot>>MediaServer >>Products

and product window will look like


Final URL for product will look like
https://*****devret.cloudax.dynamics.com/MediaServer/Products/81100_000_001.png
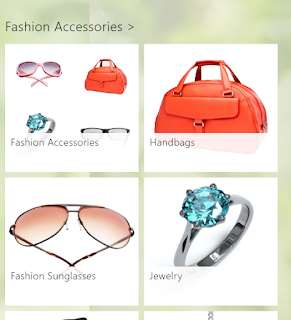

4. Category images:
"Default category attribute group" can be used to make any required change in format.

Category folder would be
Service Volume(drive)>>Retail Server >>Webroot>>MediaServer >>Categories

Default setup allows Retail server to display the category images by following the URL as
/Categories/{CategoryName}.png

However, if image has some different name or you want to display some other image irrespective of its name. you can follow the steps as mentioned below.

i.) Open product categories form as
Retail and commerce>>Products and categories>> product categories

ii.) Select category where you want to change the image as per your choice
iii). Then, click on Edit button.

iv.) Now, click on CATEGORY tab , it will show more options available under that.

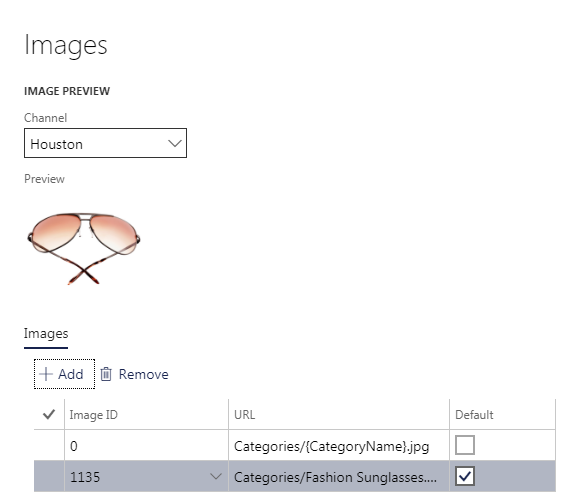
v.) Then click on images, it will open a separate form dialog as shown below.


Current image of Category is as


vi.)  Now, select the required channel and click on Add button. It will again show a popup dialog. I am taking a image as fashion sunglasses for now.
and then click on OK.

vii.) It will save the image as below. Make it default and click on OK.

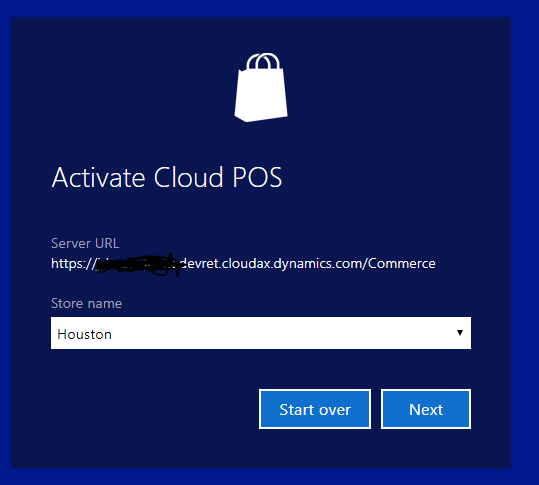
viii.) click SAVE on category form , run the distribution job 1040 and login to CPOS to see the effect.

final URL to check if image is appearing correctly would be something like this
https://*******devret.cloudax.dynamics.com/MediaServer/Categories/Fashion Sunglasses.png

It is recommended not to change default conventions available to store images. Change only when it is the last option.

That's it for now. Post your suggestions and questions if any.


Adding images to appear on POS screens for Dynamics 365 for operations-1

Ever came to situation when you need to add images for products, Customers, Workers and Categories to be displayed on Cloud POS(CPOS), Modern POS(MPOS), ecommerce site or mobile app or to share an image with some external application.

There is a pretty easy solution provided by MS to overcome all these scenarios easily and in very feasible manner.

1st and most important thing is, you need to identify the required image format or if required you can change the default format to other available formats(jpeg, jpg, gif, png, bmp).

Though the process is almost same for every group, I will proceed for each unit(Customer, Worker, Product and Category) separately.

1. Customer image:
Identify the required format of the image to be used by opening "Attribute groups" form as

Product information management>>setup>>Categories and attributes>>Attribute groups

Then, Select "Default customer attribute group" from left side window(filter), you will see form as below

It shows the attribute of selected attribute group. One of attributes is named as 'Image', we have to play around this only.
If you see the xml beside this, it contains logic that is used by CRT while getting an image for a Customer. So to get the image of a Customer, final URL would be like

<richmedialocationURL>/Customers/<CustomerNumber>.jpg

You can get the URL for richmedialocation as
Retail and commerce>>channel setup>>Channel profiles


So, what is the richmedialocation here. It is the physical path of the location on the D365 server to store media files for Retail.It can be navigated on server as

Service Volume(drive)>>Retail Server >>Webroot>>MediaServer

We 'll be using this path to store the images for entities win their respective groups.e.g., for Customer, we will store its images in path

Service Volume(drive)>>Retail Server >>Webroot>>MediaServer >>Customers

Back to Attribute, Click on Edit to see the default selected format and if required you can change it. A separate form will open as below

Clicking on Entity will show the groups where images can be stored. clicking on file extension will give all the possible formats that can be used to store the images at physical path on server.

If you are changing the file extension, click on OK button to save the changes and run the Distribution schedule job 1150 and 1040.

Let's test this and see if we are getting customer image.
I have a customer Id 004011, I took an image and placed in the previously mentioned Customer folder and renamed the image as 004011.jpg

Now, login to CPOS and search for the customer 004011 and get into the details of customer

Alternatively, you can try out the image URL in your browser to see the resulting image
https://*******devret.cloudax.dynamics.com/MediaServer/Customers/004011.jpg

Same URL can be used by external systems if required.

2. Worker image:
Worker image can also be saved using the same procedure as for Customers. Media server folder will then be Workers in that case

Service Volume(drive)>>Retail Server >>Webroot>>MediaServer >>Workers

and URL to get the worker image would be like
https://*****devret.cloudax.dynamics.com/MediaServer/Workers/000160.jpg

And on POS, it can be seen on top right corner of window.

"Default worker attribute group" can be used to do changes if required.

Although, most of the setup(attribute setup, image location) is similar for product and category images. There is a small change and additional setup required to be done in order to display the images correctly.

I'll explain remaining on my Next blog.

Tuesday 15 August 2017

Free text invoice using X++ in AX 2012

Today I'll show you to create Free text invoice using X++. I have done it in Indian localization
(after GST), you can skip those steps for other localizations.
I am creating free text invoice for price adjustment to be done on previously created Customer Invoice.

    CustInvoiceJour     custinvoicejour;
    CustInvoiceTrans    custinvoicetrans;    
    CustInvoiceTable    custInvoiceTable,custInvoiceTable1;
    CustInvoiceLine     custInvoiceLine,custInvoiceLine1;
    CustPostInvoice     custPostInvoice;
    CustTable       custtable;
    SalesLine       salesLine;
    SalesLine_IN    salesLinein;
    CustInvoiceLineTaxExtensionIN custInvoiceLineTaxExtensionIN;

    container   offsetDimensions;
    LineNum     lineNum;
    Query   q;
    QueryBuildDataSource    qbds;
    QueryRun    qr;

    q = new Query();

    qbds = q.addDataSource(tableNum(CustInvoiceJour));
    qbds.addRange(fieldNum(CustInvoiceJour, Invoiceaccount)).value("Cust1");
    qbds.addRange(fieldNum(CustInvoiceJour, InvoiceId)).value("TestInvoice1");
    qbds.addRange(fieldNum(CustInvoiceJour, InvoiceId)).value("TestInvoice2");

    qr = new QueryRun(q);

    while(qr.next())
    {
        custinvoicejour = qr.get(tableNum(CustInvoiceJour));
         //info(strFmt("%1, %2",custinvoicejour.InvoiceAccount, custinvoicejour.InvoiceDate));

        ttsBegin;

        custtable = CustTable::find(custinvoicejour.InvoiceAccount);
        custInvoiceTable.clear();
        custInvoiceTable.initFromCustTable(custtable);
        //custInvoiceTable.InvoiceDate = custinvoicejour.InvoiceDate;

        custInvoiceTable.insert();

        lineNum = 0;
        while select custinvoicetrans       
            where custinvoicetrans.InvoiceId == custinvoicejour.InvoiceId
            && custinvoicetrans.InvoiceDate == custinvoicejour.InvoiceDate
        {
            custInvoiceLine.clear();
            custInvoiceLine.initValue();
            
            //setup main account as required 
            offsetDimensions = ["999999","999999", 0, "", ""]; // you can set a Main Account with multiple financial dimensions

            custInvoiceLine.LedgerDimension = AxdDimensionUtil::getLedgerAccountId(offsetDimensions);
            custInvoiceLine.initFromCustInvoiceTable(custInvoiceTable);
            custInvoiceLine.ItemId = "001234"; //custom field     

           
            custInvoiceLine.Quantity = custinvoicetrans.Qty;
            custInvoiceLine.UnitPrice = 2.0 ;
            custInvoiceLine.modifiedField(fieldNum(CustInvoiceLine, UnitPrice));
            custInvoiceLine.Description = custinvoicetrans.itemName();

            //to get HSN code used in original invoice
            select salesLine
                where salesLine.SalesId == custinvoicetrans.SalesId
                && salesLine.ItemId == custinvoicetrans.ItemId;

            select salesLinein
                where salesLinein.SalesLine == salesLine.RecId;

            //Instead of HSNCode, you need to specify Taxgroup and Itemtaxgroup in case of other localizations
            custInvoiceLine.HSNCodeTable_IN = salesLinein.HSNCodeTable;

            custInvoiceLine.ParentRecId = custInvoiceTable.RecId;
            if(!lineNum)
            {
                lineNum = CustInvoiceLine::lastLineNum_W(custInvoiceLine.ParentRecId);
            }

            lineNum += 1;
            custInvoiceLine.LineNum = lineNum;
            custInvoiceLine.InvoiceTxt = custinvoicetrans.InvoiceId+"\n"+date2StrXpp(custinvoicetrans.InvoiceDate);//change it as per need

            custInvoiceLine.insert();
            
            //Specific to Indian localization, not required for other localizations
            custInvoiceLineTaxExtensionIN.CustInvoiceLine = custInvoiceLine.RecId;
            custInvoiceLineTaxExtensionIN.TaxInformation_IN = TaxInformation_IN::findDefaultbyLocation(DirPartyTable::find(CompanyInfo::findDataArea(curext()).PartyNumber).PrimaryAddressLocation).RecId;
            custInvoiceLineTaxExtensionIN.initValue();
            custInvoiceLineTaxExtensionIN.insert();

        }

        //Post free text invoice
        if(lineNum)
        {
            Select custInvoiceTable1 where custInvoiceTable1.RecId == custInvoiceTable.RecId;

            custPostInvoice = new CustPostInvoice(custInvoiceTable1);
            custPostInvoice.run();

            ttsCommit;

        }
        else
        {
            ttsAbort;
        }

    }
}

This is it. Share your ideas and thoughts if any.

Saturday 12 August 2017

Authorizing Dynamics 365 for Operations user to activate Cloud POS or Modern POS

I am going to show you today the steps to authorize a user to activate Cloud POS or Modern POS screens.
I am using Demo data set for this purpose and specifically USRT legal entity. I will be activating POS for HOUSTON store.

you can follow the same steps for own retail store and I assume that you already have sufficient knowledge to create Retail stores in D365O.

UserId: saddaf@Saddaftesttenant.onmicrosoft.com

In order to authorize this user for POS activation, it must be associated to a Worker.
So, open a worker from Retail and commerce Menu following a path as:

Retail and commerce >> Retail store financials >> Employees >> workers
Worker form will open as below

I am going to use Worker Alexander(000160) as it has managerial permissions. Non-manager workers like cashier can still login to POS but will not be able to activate it.
To check the permissions, click on POS permissions under Retail Tab. You can setup new user with manager permissions.


Click on Edit button on previous screen to see more information about worker. Please note that Address book of worker must include address book of store. In our case, Houston store has address book as 'houston' and so the worker 000160 contains in its address book as shown below.
This step is required for all workers who are required to log in to POS machines in Houston store.

Now, our next step is to assign a user to worker for signed activation of POS.
In above screen under external identity Tab, click on 'Associate existing identity'. You can also choose to create new identity, but that will be more tricky and so i'll try to cover it in future.
Clicking on 'Associate existing identity' button will open a form as shown below, usually it shows all created users, but you can also filter the user using email.

Now, click on OK button to associate the user with worker.
Then, open POS Devices form following a path as
Retail and commerce >> Channel setp >> POS setup >> Devices
Select application type as required, I am going to activate Cloud POS for HOUSTON-20 as selected above. Now, click on "validate devices for activation" button to open validation screen as shown above and then select worker which we have setup in previous steps and click on OK.
You'll see the success message as shown below, if not then re-verify the previous steps.
Now we are ready to activate Cloud POS.

Open Cloud POS using provided URI in browser(edge browser is best supported). URI will look something as
https://<hostURI>devpos.cloudax.dynamics.com/

On clicking Next, It will ask you to provide authorized user credentials to proceed for activation screen. I'll be using same user as mentioned on top to get up to that screen.
Retail server URL is filled automatically and will look like
https://<hostURI>devret.cloudax.dynamics.com/
Click on Next button to validate the URL and to retrive Stores automatically. you can opt to enter the these details manually. On the next screen, select store as 'HOUSTON' and click next.

Next screen will give away all Register-Devices combination that are available to activate. If you'll click on drop down, it will show all devices with status as Activated or Pending. We'll select HOUSTON-20
Then Final step is to Click on Activate button. It creates device token and collects all related configurations. You'll see the final screen as below.


Great, you have now activated the cloud POS. Let's see how it looks and what effects are done on D365O side.
Click on Get started button on above screen.

Kool, now enter worker credentials created in D365O(remember only workers which contains address book as 'houston' will be able to login here). You'll see the differences in POS screens/options for manager and non-manager roles. For 000160, default password is 123.

Kool, isn't it? Only internet connectivity and browser is required to activate Cloud POS(CPOS). It can be used on any kind of device be it Windows PC,Mac PC, Mobile, tablets.
Keep in mind,1 Device can only remain activated for 1 browser. Even, activating it in another browser on same machine will override the previous activation.

Now, move to D365O screen in Devices form and select HOUSTON-20.

You can see that Device status has been updated as 'Activated' with its Activation date&time and Activated by(worker id).

Thanks. Do share your thoughts or queries.

Wednesday 9 August 2017

CRUD with Odata and Data entities in Dynamics 365 for operations - READ Operations-3

....contnd from part 2

7.use of logical operators

i.) NOT
https://*******devaos.cloudax.dynamics.com/data/Beaconservice?$filter=not(BeaconNum eq '123456789')

OR

https://********devaos.cloudax.dynamics.com/data/Beaconservice?$filter=BeaconNum ne '123456789'


{
    "@odata.context": "https://********devaos.cloudax.dynamics.com/data/$metadata#Beaconservice",
    "value": [
        {
            "@odata.etag": "W/\"Jzg0ODAyMzczOCw1NjM3MTQ0NTc3Jw==\"",
            "Description": "Beacon 2",
            "dataAreaId": "usrt",
            "BeaconNum": "234567891",
            "EffectiveDate": "2017-01-08T12:00:00Z",
            "BeaconStatus": "InActive",
            "Brand": "Brand2",
            "StartTime": 0,
            "Category": "Category2",
            "EndTime": 0,
            "Offer": "",
            "OfferId": "offer2"
        },
        {
            "@odata.etag": "W/\"JzEsNTYzNzE0NDU3OCc=\"",
            "Description": "Beacon 3",
            "dataAreaId": "usrt",
            "BeaconNum": "345678912",
            "EffectiveDate": "2017-05-08T12:00:00Z",
            "BeaconStatus": "Active",
            "Brand": "Brand3",
            "StartTime": 0,
            "Category": "Category3",
            "EndTime": 0,
            "Offer": "",
            "OfferId": "Offer3"
        }
    ]
}

ii.) CONTAINS(*)
https://*********devaos.cloudax.dynamics.com/data/Beaconservice?$filter=BeaconNum eq '*9'


{
    "@odata.context": "https://**********devaos.cloudax.dynamics.com/data/$metadata#Beaconservice",
    "value": [
        {
            "@odata.etag": "W/\"JzE0NTk5MjkxNjcsNTYzNzE0NDU3Nic=\"",
            "Description": "beacon 1",
            "dataAreaId": "usrt",
            "BeaconNum": "123456789",
            "EffectiveDate": "2017-01-08T12:00:00Z",
            "BeaconStatus": "Active",
            "Brand": "Brand1",
            "StartTime": 0,
            "Category": "Category1",
            "EndTime": 0,
            "Offer": "",
            "OfferId": "Offer1"
        }
    ]
}

iii.) AND
https://********devaos.cloudax.dynamics.com/data/Beaconservice?$filter=BeaconNum eq '345678912' and OfferId eq 'Offer3'
{
    "@odata.context": "https://*******devaos.cloudax.dynamics.com/data/$metadata#Beaconservice",
    "value": [
        {
            "@odata.etag": "W/\"JzEsNTYzNzE0NDU3OCc=\"",
            "Description": "Beacon 3",
            "dataAreaId": "usrt",
            "BeaconNum": "345678912",
            "EffectiveDate": "2017-05-08T12:00:00Z",
            "BeaconStatus": "Active",
            "Brand": "Brand3",
            "StartTime": 0,
            "Category": "Category3",
            "EndTime": 0,
            "Offer": "",
            "OfferId": "Offer3"
        }
    ]
}

iv.) OR
https://*********devaos.cloudax.dynamics.com/data/Beaconservice?$filter=BeaconNum eq '345678912' or BeaconNum eq '123456789'
{
    "@odata.context": "https://********devaos.cloudax.dynamics.com/data/$metadata#Beaconservice",
    "value": [
        {
            "@odata.etag": "W/\"JzE0NTk5MjkxNjcsNTYzNzE0NDU3Nic=\"",
            "Description": "beacon 1",
            "dataAreaId": "usrt",
            "BeaconNum": "123456789",
            "EffectiveDate": "2017-01-08T12:00:00Z",
            "BeaconStatus": "Active",
            "Brand": "Brand1",
            "StartTime": 0,
            "Category": "Category1",
            "EndTime": 0,
            "Offer": "",
            "OfferId": "Offer1"
        },
        {
            "@odata.etag": "W/\"JzEsNTYzNzE0NDU3OCc=\"",
            "Description": "Beacon 3",
            "dataAreaId": "usrt",
            "BeaconNum": "345678912",
            "EffectiveDate": "2017-05-08T12:00:00Z",
            "BeaconStatus": "Active",
            "Brand": "Brand3",
            "StartTime": 0,
            "Category": "Category3",
            "EndTime": 0,
            "Offer": "",
            "OfferId": "Offer3"
        }
    ]
}

Other than the operators explained, below mentioned logical operators can be used in a same manner.

v.)Greater Than(gt)
vi.)Greater Than or Equal(ge)
vii.)Less Than(lt)
viii.)Less Than or Equal(le)

There are some arithmetic operators that can be used on integer/real type fields to produce result.

xi.) ADDITION (add)
x.)SUBTRACTION (sub)
xi.)MULTIPLICATION (mul)
xii.)DIVISION (div)

Then there is one more operator that has to be used extensively.

AMPERSAND(&)
There might be situations when you need to use previously explained query operators(filter, select, etc..) together to produce relevant set of data.

https://**********devaos.cloudax.dynamics.com/data/Beaconservice?$filter=BeaconNum eq '345678912' &$select=BeaconNum,Description,OfferId


{
    "@odata.context": "https://*********devaos.cloudax.dynamics.com/data/$metadata#Beaconservice(BeaconNum,Description,OfferId)",
    "value": [
        {
            "@odata.etag": "W/\"JzEsNTYzNzE0NDU3OCc=\"",
            "BeaconNum": "345678912",
            "Description": "Beacon 3",
            "OfferId": "Offer3"
        }
    ]
}

This was my last post on READ operations. On Next blog, I will be discussing about remaining operations of CREATE, UPDATE and DELETE.

Not to mention, I welcome any suggestion or queries on this post.

Monday 7 August 2017

CRUD with Odata and Data entities in Dynamics 365 for operations - READ Operations-2

....Contnd from part 1

1. SORTING:
you can sort the data so as to display data in ascending or descending order as below using keyword $orderby

https://********devaos.cloudax.dynamics.com/data/Beaconservice?$orderby=BeaconNum desc

and the result will look like as below. However, for sorting multiple fields can be used as
https://********devaos.cloudax.dynamics.com/data/Beaconservice?$orderby=BeaconNum desc,OfferId asc


{
    "@odata.context": "https://*****devaos.cloudax.dynamics.com/data/$metadata#Beaconservice",
    "value": [
        {
            "@odata.etag": "W/\"JzEsNTYzNzE0NDU3OCc=\"",
            "Description": "Beacon 3",
            "dataAreaId": "usrt",
            "BeaconNum": "345678912",
            "EffectiveDate": "2017-05-08T12:00:00Z",
            "BeaconStatus": "Active",
            "Brand": "Brand3",
            "StartTime": 0,
            "Category": "Category3",
            "EndTime": 0,
            "Offer": "",
            "OfferId": "Offer3"
        },
        {
            "@odata.etag": "W/\"Jzg0ODAyMzczOCw1NjM3MTQ0NTc3Jw==\"",
            "Description": "Beacon 2",
            "dataAreaId": "usrt",
            "BeaconNum": "234567891",
            "EffectiveDate": "2017-01-08T12:00:00Z",
            "BeaconStatus": "InActive",
            "Brand": "Brand2",
            "StartTime": 0,
            "Category": "Category2",
            "EndTime": 0,
            "Offer": "",
            "OfferId": "offer2"
        },
        {
            "@odata.etag": "W/\"JzE0NTk5MjkxNjcsNTYzNzE0NDU3Nic=\"",
            "Description": "beacon 1",
            "dataAreaId": "usrt",
            "BeaconNum": "123456789",
            "EffectiveDate": "2017-01-08T12:00:00Z",
            "BeaconStatus": "Active",
            "Brand": "Brand1",
            "StartTime": 0,
            "Category": "Category1",
            "EndTime": 0,
            "Offer": "",
            "OfferId": "Offer1"
        }
    ]
}

2. FILTER(Get selective records):
You can filter out the records based on selection criteria to get relevant data. keyword would be $filter
https://********devaos.cloudax.dynamics.com/data/Beaconservice?$filter=BeaconNum eq '345678912'


{
    "@odata.context": "https://********devaos.cloudax.dynamics.com/data/$metadata#Beaconservice",
    "value": [
        {
            "@odata.etag": "W/\"JzEsNTYzNzE0NDU3OCc=\"",
            "Description": "Beacon 3",
            "dataAreaId": "usrt",
            "BeaconNum": "345678912",
            "EffectiveDate": "2017-05-08T12:00:00Z",
            "BeaconStatus": "Active",
            "Brand": "Brand3",
            "StartTime": 0,
            "Category": "Category3",
            "EndTime": 0,
            "Offer": "",
            "OfferId": "Offer3"
        }
    ]
}

If provided field is of type Int, then you don't have to use singe quotes(').
However, there is a trick if you want to use a filter on Enum field. you need to have a AOT name of an used enum. In my case AOT name of an enum is BeaconStatus with values "Active","Inactive" and "Locked".
enum field is "BeaconStatus".
After fieldname, value have to be passed using "Microsoft.Dynamics.DataEntities" as below.
If you have read my previous post, full metadata provides us the type to use. In our case it was "Microsoft.Dynamics.DataEntities.BeaconStatus"
I have to filter out the records where BeaconStatus is 'InActive'.

https://********devaos.cloudax.dynamics.com/data/Beaconservice?$filter=BeaconStatus eq Microsoft.Dynamics.DataEntities.BeaconStatus'InActive'

{
    "@odata.context": "https://*********devaos.cloudax.dynamics.com/data/$metadata#Beaconservice",
    "value": [
        {
            "@odata.etag": "W/\"Jzg0ODAyMzczOCw1NjM3MTQ0NTc3Jw==\"",
            "Description": "Beacon 2",
            "dataAreaId": "usrt",
            "BeaconNum": "234567891",
            "EffectiveDate": "2017-01-08T12:00:00Z",
            "BeaconStatus": "InActive",
            "Brand": "Brand2",
            "StartTime": 0,
            "Category": "Category2",
            "EndTime": 0,
            "Offer": "",
            "OfferId": "offer2"
        }
    ]
}

To Filter out records based on the date or datetime field, you need to provide it in Json standards as 2017-01-08T12:00:00Z https://*********devaos.cloudax.dynamics.com/data/Beaconservice?$filter=EffectiveDate eq 2017-05-08T12:00:00Z
Output will be as below
{
  "@odata.context":"https://********devaos.cloudax.dynamics.com/data/$metadata#Beaconservice",
  "value":[
    {
      "@odata.etag":"W/\"JzEsNTYzNzE0NDU3OCc=\"",
   "Description":"Beacon 3",
   "dataAreaId":"usrt",
   "BeaconNum":"345678912",
   "EffectiveDate":"2017-05-08T12:00:00Z",
   "BeaconStatus":"Active",
   "Brand":"Brand3",
   "StartTime":0,"Category":
   "Category3","EndTime":0,
   "Offer":"",
   "OfferId":"Offer3"
    }
  ]
}

3. SELECTED FIELDS:
You might face a scenario where you don't need all fields to be displayed. for that you can use $select

https://*********devaos.cloudax.dynamics.com/data/Beaconservice?$select=BeaconNum,Description,OfferId

Result will look like
{
    "@odata.context": "https://******devaos.cloudax.dynamics.com/data/$metadata#Beaconservice(BeaconNum,Description,OfferId)",
    "value": [
        {
            "@odata.etag": "W/\"JzE0NTk5MjkxNjcsNTYzNzE0NDU3Nic=\"",
            "BeaconNum": "123456789",
            "Description": "beacon 1",
            "OfferId": "Offer1"
        },
        {
            "@odata.etag": "W/\"Jzg0ODAyMzczOCw1NjM3MTQ0NTc3Jw==\"",
            "BeaconNum": "234567891",
            "Description": "Beacon 2",
            "OfferId": "offer2"
        },
        {
            "@odata.etag": "W/\"JzEsNTYzNzE0NDU3OCc=\"",
            "BeaconNum": "345678912",
            "Description": "Beacon 3",
            "OfferId": "Offer3"
        }
    ]
}
4.Get selective number of records(TOP):
There might be scenarios where you  might want to get only few top records. $top keyword can be used for this purpose as below
https://*********devaos.cloudax.dynamics.com/data/Beaconservice?$top=1

{
    "@odata.context": "https://********devaos.cloudax.dynamics.com/data/$metadata#Beaconservice",
    "value": [
        {
            "@odata.etag": "W/\"JzE0NTk5MjkxNjcsNTYzNzE0NDU3Nic=\"",
            "Description": "beacon 1",
            "dataAreaId": "usrt",
            "BeaconNum": "123456789",
            "EffectiveDate": "2017-01-08T12:00:00Z",
            "BeaconStatus": "Active",
            "Brand": "Brand1",
            "StartTime": 0,
            "Category": "Category1",
            "EndTime": 0,
            "Offer": "",
            "OfferId": "Offer1"
        }
    ]
}

5. Skip some records from result(SKIP)
If you want to skip some records for selection using $skip
https://**********devaos.cloudax.dynamics.com/data/Beaconservice?$skip=2


{
    "@odata.context": "https://*********devaos.cloudax.dynamics.com/data/$metadata#Beaconservice",
    "value": [
        {
            "@odata.etag": "W/\"JzEsNTYzNzE0NDU3OCc=\"",
            "Description": "Beacon 3",
            "dataAreaId": "usrt",
            "BeaconNum": "345678912",
            "EffectiveDate": "2017-05-08T12:00:00Z",
            "BeaconStatus": "Active",
            "Brand": "Brand3",
            "StartTime": 0,
            "Category": "Category3",
            "EndTime": 0,
            "Offer": "",
            "OfferId": "Offer3"
        }
    ]
}

6.COUNT
https://*******devaos.cloudax.dynamics.com/data/Beaconservice/$count


3

Will be discussing about use of logical operators with Data entities on my Next blog on READ operations.

Saturday 5 August 2017

CRUD with Odata and Data entities in Dynamics 365 for operations - READ Operations

Before starting anything, I assume that you are already aware of Data Entity concepts in D365O.If not, please go through the link below
Data Entites

Also, If you want to see what is Odata and what it does in D365O, click on below link
Odata in D365

By this time, you are already aware that Data Entities follows Odata protocols and present you the data in Json format.
So, how actually following up of Odata helps us?
It actually has lot of positiveness other than just representation of data. As per the Odata protocol definition, it supports Create, Read, Update and Delete(CRUD)-style operations and so it can be used superbly for integration with external systems.

Of course, before proceeding ahead i must tell you that, to access anything outside of D365O you need access token(Bearer token) which I have already explained on my previous post
Get Token to expose data outside of D365 for Operations

Now, the question is how does CRUD actually works for D365O data entities. I will be explaining each operation one by one.

I have created a data entity named as "BeaconEntity" for this purpose, but you can follow same process for any of the available public entity also.
I will be using POSTMAN tool to try out all these operations. you can opt to use Fiddler(as it is used by MS). You can also use other tools as well as your coding skills in other languages to test out all these things.
Just for testing of READ Operations, you can use the 2nd tab of browser where  you are already logged in to D365O and if its session is not yet expired.

Before proceeding ahead, you might consider getting a fullmetadata.
https://********devaos.cloudax.dynamics.com/data/Beaconservice?$format=application/json;odata.metadata=full


{
    "@odata.context": "https://************devaos.cloudax.dynamics.com/data/$metadata#Beaconservice",
    "value": [
        {
            "@odata.type": "#Microsoft.Dynamics.DataEntities.BeaconService",
            "@odata.id": "https://******devaos.cloudax.dynamics.com/data/Beaconservice(dataAreaId='usrt',BeaconNum='123456789')",
            "@odata.etag": "W/\"JzE0NTk5MjkxNjcsNTYzNzE0NDU3Nic=\"",
            "@odata.editLink": "Beaconservice(dataAreaId='usrt',BeaconNum='123456789')",
            "Description": "beacon 1",
            "dataAreaId": "usrt",
            "BeaconNum": "123456789",
            "EffectiveDate@odata.type": "#DateTimeOffset",
            "EffectiveDate": "2017-01-08T12:00:00Z",
            "BeaconStatus@odata.type": "#Microsoft.Dynamics.DataEntities.BeaconStatus",
            "BeaconStatus": "Active",
            "Brand": "Brand1",
            "StartTime": 0,
            "Category": "Category1",
            "EndTime": 0,
            "Offer": "",
            "OfferId": "Offer1"
        },
        {
            "@odata.type": "#Microsoft.Dynamics.DataEntities.BeaconService",
            "@odata.id": "https://***********devaos.cloudax.dynamics.com/data/Beaconservice(dataAreaId='usrt',BeaconNum='234567891')",
            "@odata.etag": "W/\"Jzg0ODAyMzczOCw1NjM3MTQ0NTc3Jw==\"",
            "@odata.editLink": "Beaconservice(dataAreaId='usrt',BeaconNum='234567891')",
            "Description": "Beacon 2",
            "dataAreaId": "usrt",
            "BeaconNum": "234567891",
            "EffectiveDate@odata.type": "#DateTimeOffset",
            "EffectiveDate": "2017-01-08T12:00:00Z",
            "BeaconStatus@odata.type": "#Microsoft.Dynamics.DataEntities.BeaconStatus",
            "BeaconStatus": "InActive",
            "Brand": "Brand2",
            "StartTime": 0,
            "Category": "Category2",
            "EndTime": 0,
            "Offer": "",
            "OfferId": "offer2"
        },
        {
            "@odata.type": "#Microsoft.Dynamics.DataEntities.BeaconService",
            "@odata.id": "https://*********devaos.cloudax.dynamics.com/data/Beaconservice(dataAreaId='usrt',BeaconNum='345678912')",
            "@odata.etag": "W/\"JzEsNTYzNzE0NDU3OCc=\"",
            "@odata.editLink": "Beaconservice(dataAreaId='usrt',BeaconNum='345678912')",
            "Description": "Beacon 3",
            "dataAreaId": "usrt",
            "BeaconNum": "345678912",
            "EffectiveDate@odata.type": "#DateTimeOffset",
            "EffectiveDate": "2017-05-08T12:00:00Z",
            "BeaconStatus@odata.type": "#Microsoft.Dynamics.DataEntities.BeaconStatus",
            "BeaconStatus": "Active",
            "Brand": "Brand3",
            "StartTime": 0,
            "Category": "Category3",
            "EndTime": 0,
            "Offer": "",
            "OfferId": "Offer3"
        }
    ]
}

READ(R):-
oh, there should be CREATE operation 1st, did i forgot the sequence, no i didn't. As READ is the most basic operation without doing much and so i have mentioned it 1st.
To read the data, you just need 3 things
1. Make the entity public
2. Get access(bearer) token.
3. Have a name of Entity with you.

open Postman, paste your hostURI succeeded by /data/<entityName>. 
Please note that for all Read operations, method type should always be GET.
Pass the key as "Authorization" and paste its value as <bearer token> you already have.


Then click on Send button to get the available data from D365O based on the user rights and default company(for me its USRT) assigned to him.
https://*********devaos.cloudax.dynamics.com/data/Beaconservice
I have 3 records in table and so the output looks like below:

{
    "@odata.context": "https://*********devaos.cloudax.dynamics.com/data/$metadata#Beaconservice",
    "value": [
        {
            "@odata.etag": "W/\"JzE0NTk5MjkxNjcsNTYzNzE0NDU3Nic=\"",
            "Description": "beacon 1",
            "dataAreaId": "usrt",
            "BeaconNum": "123456789",
            "EffectiveDate": "2017-01-08T12:00:00Z",
            "BeaconStatus": "Active",
            "Brand": "Brand1",
            "StartTime": 0,
            "Category": "Category1",
            "EndTime": 0,
            "Offer": "",
            "OfferId": "Offer1"
        },
        {
            "@odata.etag": "W/\"Jzg0ODAyMzczOCw1NjM3MTQ0NTc3Jw==\"",
            "Description": "Beacon 2",
            "dataAreaId": "usrt",
            "BeaconNum": "234567891",
            "EffectiveDate": "2017-01-08T12:00:00Z",
            "BeaconStatus": "InActive",
            "Brand": "Brand2",
            "StartTime": 0,
            "Category": "Category2",
            "EndTime": 0,
            "Offer": "",
            "OfferId": "offer2"
        },
        {
            "@odata.etag": "W/\"JzEsNTYzNzE0NDU3OCc=\"",
            "Description": "Beacon 3",
            "dataAreaId": "usrt",
            "BeaconNum": "345678912",
            "EffectiveDate": "2017-05-08T12:00:00Z",
            "BeaconStatus": "Active",
            "Brand": "Brand3",
            "StartTime": 0,
            "Category": "Category3",
            "EndTime": 0,
            "Offer": "",
            "OfferId": "Offer3"
        }
    ]
}

CROSS-COMPANY:
This can come very handy if you have to get records from other company(other than the default mapped company with the user).
https://********devaos.cloudax.dynamics.com/data/Beaconservice?$filter=dataAreaId eq 'usmf' &cross-company=true

setting up 'cross-company' will give records from all the Legal entities irrespective of the default legal entity. Below is the result of my query.

{
  "@odata.context":"https://********devaos.cloudax.dynamics.com/data/$metadata#Beaconservice","value":[
    
  ]
}

Its blank, as i don't have any record in USMF.
you can also use only cross-company without any filter as shown below to get consolidated records from all the legal entities.
https://********devaos.cloudax.dynamics.com/data/Beaconservice?cross-company=true

I will dig more deep into READ operation to get required data and required format.
But, thats on Part 2 of this Post.

Thursday 3 August 2017

Form Personalize option in Dynamics 365 for Operations

I assume that you are already familiar with Form personalization option in Dynamics AX (up to AX 2012 R3) and everyone loves it for one or other reason be it a technical guy , functional or an end user.

Being a technical consultant it provided me a lot of help while searching the name and properties of object(with its hierarchical nodes, datasources etc.) as it appears in AOT.

Now the question is, where is this Personalize option in D365O and how does it works. I will try to explain it as in manner I have explored it till now.

Personalization is now divided into 2 separate options
1. Form information (meant to see technical aspects of control and form)
2. Personalize (all non technical options like Hide/show as before is available here)
I will dig into both options one after another.

Throughout the article, I am taking "All customers" form for reference.

same as until AX 2012 R3, you can right click anywhere on the form to see the available options. Though, options differ depending upon the location of the form you click. for example, if you will click on top of the form, you will only be able to see option "Form information" and if you right click on any control, you can see more options including "Form information" & "Personalize" as shown below.


Form information:-
Clicking on "Form information" will again give you 2 options, 1st is Form name and 2nd is control name as it appears in Application explorer(if you are doing right click at control level)

Clicking on "Control name" will do nothing as it is just for display purpose. To dug deep into control, click on "Form name", it will open a webdialog form with more information about selected control and form.
This new form will be displaying 3 groups, 1st is control details, 2nd is "Manage" to export and import metadata for form,. 3rd tab is "Administration" to know more technicalities of form and control as can be seen in image below.


one interesting thing is Query statement which is too useful to understand how(linked tables and other datasources) and what form displays(or can be displayed).

a drawback compared to AX2012 I found here is the embedded navigation option inside "form information" to view properties of other available controls. Never know, if MS can come up with something in future to overcome this.

Personalize:
This option is available to change look and feel for form and fields. As soon as you'll click on "Personalize" option, you will be  presented with a small dialog like below where you can do the basic changes like renaming the control.
To see more available options, click on "Personalize this form". It will again popup a form with more options such as '+' button to add more fields to a form.
All of the personalization options are beautifully explained on below mentioned community blog link. So I am avoiding rewriting those things here again.
Form Personalization

I am done here!!
Questions or suggestions if any, please mention in a comment.

Wednesday 2 August 2017

Get access token to expose data outside of D365 for Operations

You might be aware that Dynamics 365 follows Azure active directory(AAD) authentication to validate the legitimate users.

I am not gonna explain you the full authentication scenario here. It's already explained on below link
D365 for operation Authentication

I assume that you have successfully registered Native App on your Azure subscription.
your redirectURI will look something like this(change the URI with actual)
https://<EnvironmentName>devaos.cloudax.dynamics.com/
Tip: Take utmost care of character casing while defining RedirectURI

 Now, I will show you the code snippet to get access token and how to use it to expose data outside of D365 for Operations.

 I am using Visual studio 2015 for this purpose.

1. Create new C# project in VS as GetAccessTokenD365.
2. Add Microsoft Identity model package(Microsoft.IdentityModel) from Nuget if not available for reference already.
3. Then add class to your project name it as ClientConfiguration. Here you will define parameters to be used for authentication as below.
using System;
using System.Collections.Generic;
using System.Linq;
using System.Text;
using System.Threading.Tasks;

namespace GetAccessTokenD365
{
    public partial class ClientConfiguration
    {
        public static ClientConfiguration Default { get { return ClientConfiguration.OneBox; } }
 
        public static ClientConfiguration OneBox = new ClientConfiguration()
        {
            UriString = "https://*******devaos.cloudax.dynamics.com/",
            UserName = "axuser@TenantId.onmicrosoft.com",
            Password = "password",
            ActiveDirectoryResource = "https://******devaos.cloudax.dynamics.com",

            ActiveDirectoryTenant = "https://login.windows.net/tenantId.onmicrosoft.com", 
            ActiveDirectoryClientAppId = "ActualClientId",
        };
 
         public string UriString { get; set; }
         public string UserName { get; set; }
         public string Password { get; set; }
         public string ActiveDirectoryResource { get; set; }
         public String ActiveDirectoryTenant { get; set; }
         public String ActiveDirectoryClientAppId { get; set; }
}
}

4. Add another class and name it as OAuthHelper. This class contains whole logic to deal with AAD Authentication.
using Microsoft.IdentityModel.Clients.ActiveDirectory;
using System;
using System.Collections.Generic;
using System.Linq;
using System.Text;
using System.Threading.Tasks;

namespace GetAccessTokenD365
{
    public class OAuthHelper
    {
          /// 
         /// The header to use for OAuth.
         /// 
         public const string OAuthHeader = "Authorization";

        /// 
        /// Retrieves an authentication header from the service.
        /// 
        /// The authentication header for the Web API call.
        public static string GetAuthenticationHeader()
        {         

            string aadTenant = ClientConfiguration.Default.ActiveDirectoryTenant;
            string aadClientAppId = ClientConfiguration.Default.ActiveDirectoryClientAppId;
            string aadResource = ClientConfiguration.Default.ActiveDirectoryResource;

            AuthenticationContext authenticationContext = new AuthenticationContext(aadTenant);
           
            // OAuth through username and password.
            string username = ClientConfiguration.Default.UserName;
            string password = ClientConfiguration.Default.Password;        

            // Get token object
            AuthenticationResult authenticationResult = authenticationContext.AcquireToken(aadResource, aadClientAppId, new UserCredential(username, password));

            Console.WriteLine(authenticationResult.CreateAuthorizationHeader());
            Console.ReadLine();

            // Create and get JWT token
            return authenticationResult.CreateAuthorizationHeader();
        }       
    }
}

5. Now, write a class with a main method to execute the logic.
using System;
using System.Collections.Generic;
using System.Linq;
using System.Text;
using System.Threading.Tasks;

namespace GetAccessTokenD365
{
    class Program
    {
        static void Main(string[] args)
        {
            OAuthHelper OAuthhelper;

            OAuthhelper = new OAuthHelper();
            OAuthHelper.GetAuthenticationHeader();
        }
    }
}


6. We are done with the code. Finally, your solution explorer will look as shown above.
Now its the time to execute it and get access token. Just build the project and run it.
Now we have access token with us, its time to test it. I am using Postman tool for this purpose, you can use fiddler as well.
Copy the generated token from console.

Open Postman and type the URL(public data entity) to get all customers which will look like as below.
https://*******devaos.cloudax.dynamics.com/data/Customers

As shown in the above picture, paste your token alongwith keyword 'bearer' in to the value field for Authorization key.
And then click on Send button, it will produce the resulting JSon in body of Postman as shown below.


Hurray! We are done. And I am done with my 1st technical post.
I welcome any suggestion or question.

Tuesday 1 August 2017

Technical sources for Dynamics AX Learning

This is my first blog and I want to share my experience and knowledge of AX and Dynamics 365 with all of you. Wish me a luck. This is just the beginning and i hope to be posting so many things in upcoming days.
In the series first, what most freshers(New to dynamics AX) try to google is the good sources to learn AX, so I will be mentioning few of the best sources which I personally found to be useful during my journey of AX.

Dynamics AX free online content:
1. https://msdn.microsoft.com/en-us/library/aa493463(v=ax.10).aspx : Free online material by Microsoft for Dynamics AX and its evolved so much to be informative enough.
2. https://technet.microsoft.com/en-us/library/gg852966.aspx :  Another online material from Microsoft.dedicated fully for technical aspects. There are so many whitepapers available to download for free from here in order to explain some advanced topics in AX (e.g., Etterprise portal, global address book, number sequence framework, dimension framework, etc..)
3. https://docs.microsoft.com/en-gb/dynamics365: Dedicated completely for Dynamics 365 based products and contains enormous explanatory contents on every topic.

Books to start with:-
6. Learning MS Dynamics AX 2012 Programming : Printed by PACKT publishing, and is available to purchase from Amazon.

Advanced books:-
7. AX Installation guide: provides complete specification and AX installation steps. Available as whitepaper on technet.
8. Microsoft Dynamics AX 2012 R3 administration cookbook:  complete coverage of system administration for AX. Printed by PACKT publishing and is available to purchase from Amazon.
9. Microsoft Dynamics AX 2012 R3 Reporting cookbook:  Fully dedicated for SSRS reporting in AX. Printed by PACKT publishing and is available to purchase from Amazon.
10. Microsoft Dynamics AX 2012 R3 Services : Completed coverage of AIF and services in AX. Printed by PACKT publishing and is available to purchase from Amazon.
11. Inside Microsoft Dynamics AX 2012 R3 : One of the books by Microsoft Press. Available to purchase from Amazon.
11. Dynamics 365 for Finance and operations development cookbook : One of the books by pktpub . Available to purchase from Amazon.

AX community forums:-
12. https://community.dynamics.com/ax : Official community from Microsoft. By far the best online forum to post your questions and you might be interested to see the answers for questions(queries/issues) posted by others. In addition, there are couple of AX techies who frequently posts their article on the forum.
13. Dynamics user group
14. Stackoverflow

In addition there are plenty of professionals who are running their own blogs. I will not name any, but you can always come across them while trying to search anything related to AX.
Tip: Before posting your questions on any of the forums or blogs, its better to google that using significant keywords. You might get answers/articles to the same question/topic posted by others.

I have tried to cover most of the available learning resources here. Still, if I have left anything which you are aware of, feel free to share with me to update the article.